How to Use KDS
Purpose
Use this guide when kitchen tickets appear on the KDS screen and staff need to manage them during service.
Before You Start
- The device must be signed in and opened to the kitchen display screen.
- The POS or order source must send kitchen items to KDS. Gift card-only items do not create kitchen tickets.
- Check the connection status at the bottom-left of the screen. KDS shows Cloud Connected, LAN Connected, or Disconnected.
Read the KDS Screen
-
Use the top tabs to switch between order types such as All, Dinein, and Takeaway. The number beside each tab is the ticket count for that order type.
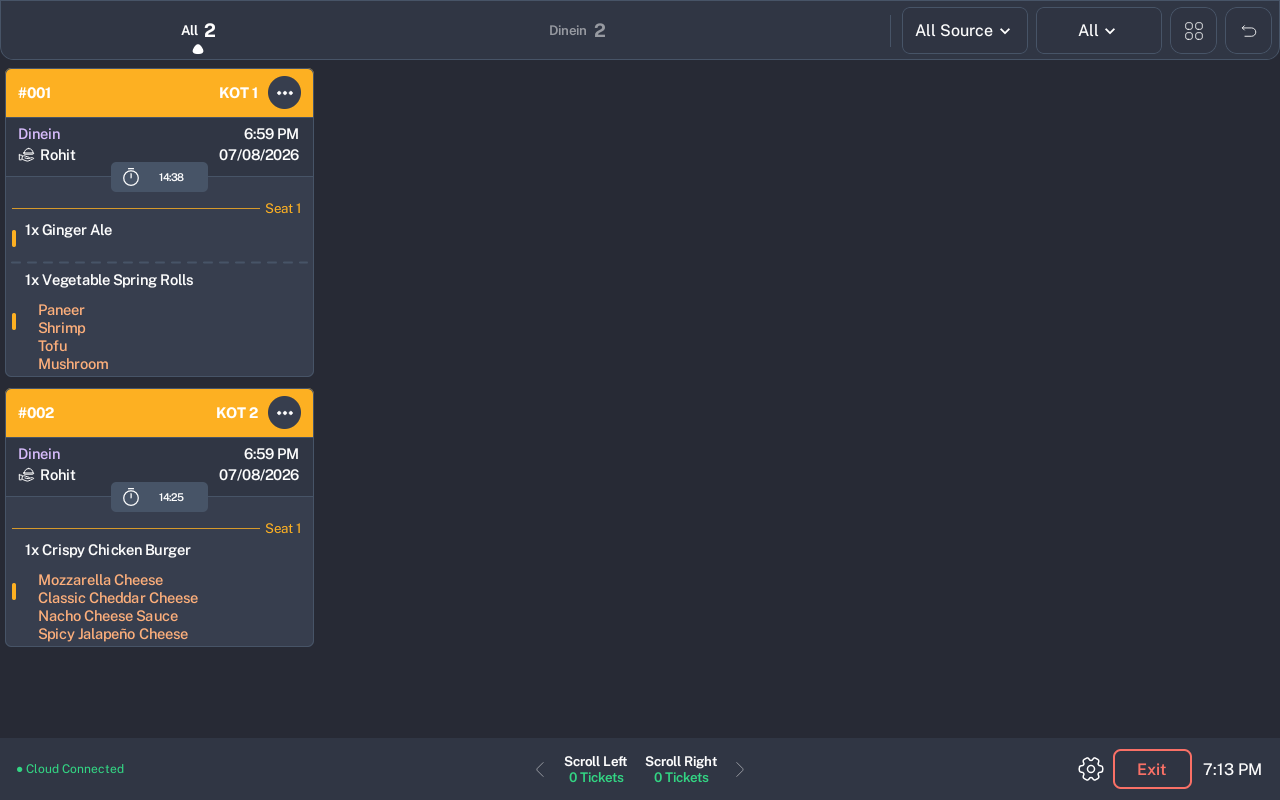
- Read each ticket card from top to bottom: order number, KOT number, order type, staff name, time, date, timer, seat, items, modifiers, notes, allergies, and priority or void/wastage labels.
Use Filters and Inventory Labels
- Tap an order type tab, such as All, Dinein, or Takeaway, to show only that type of ticket.
-
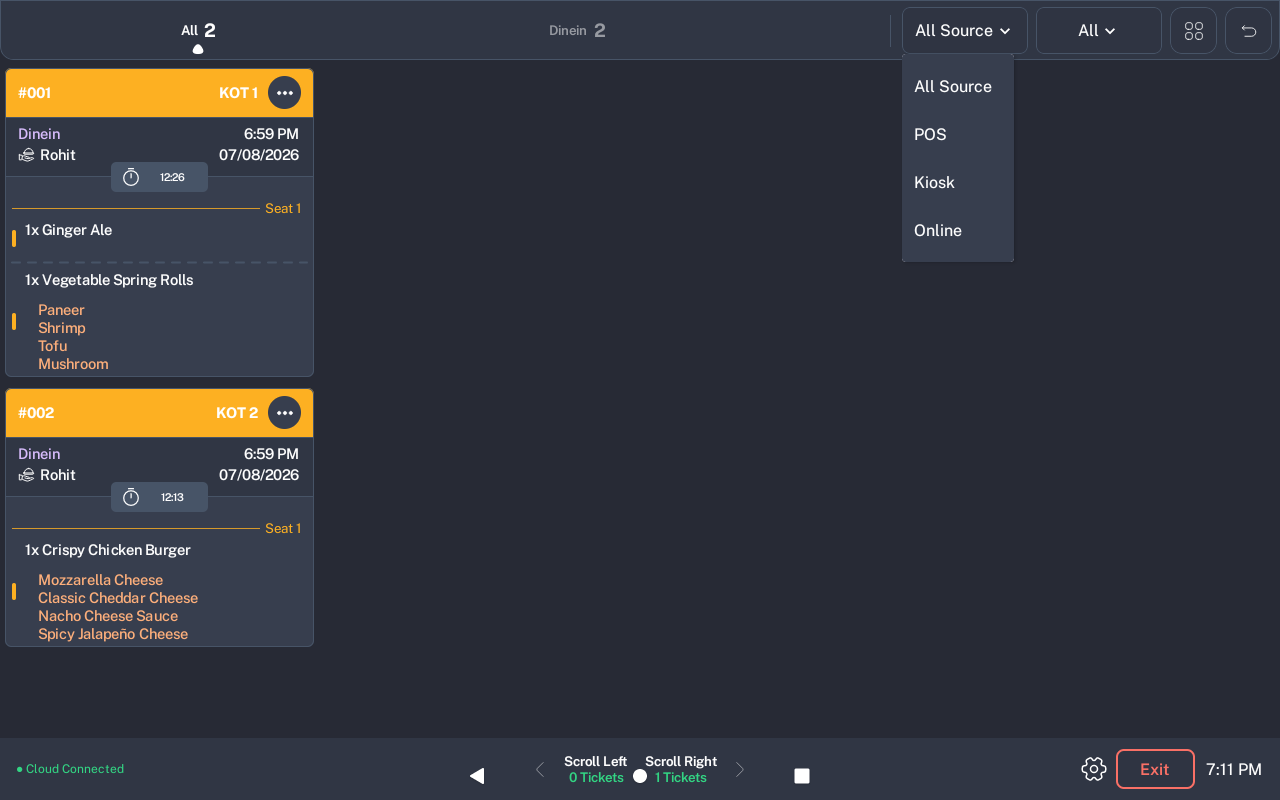
Tap All Source to choose All Source, POS, Kiosk, or Online.
-
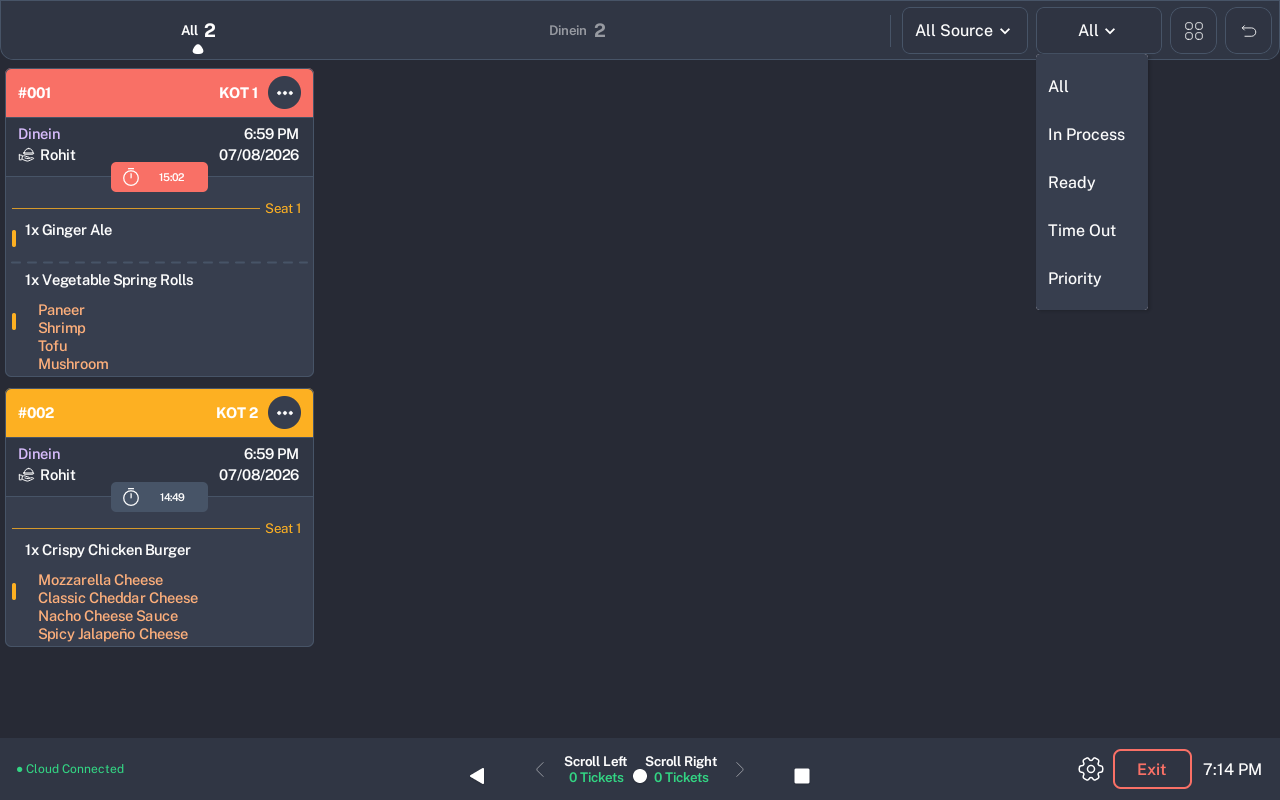
Tap the status filter beside source to choose All, In Process, Ready, Time Out, or Priority.
-
Tap the filter icon to open inventory labels. Select one or more station labels, such as grill, bar, or kitchen labels configured for the restaurant.
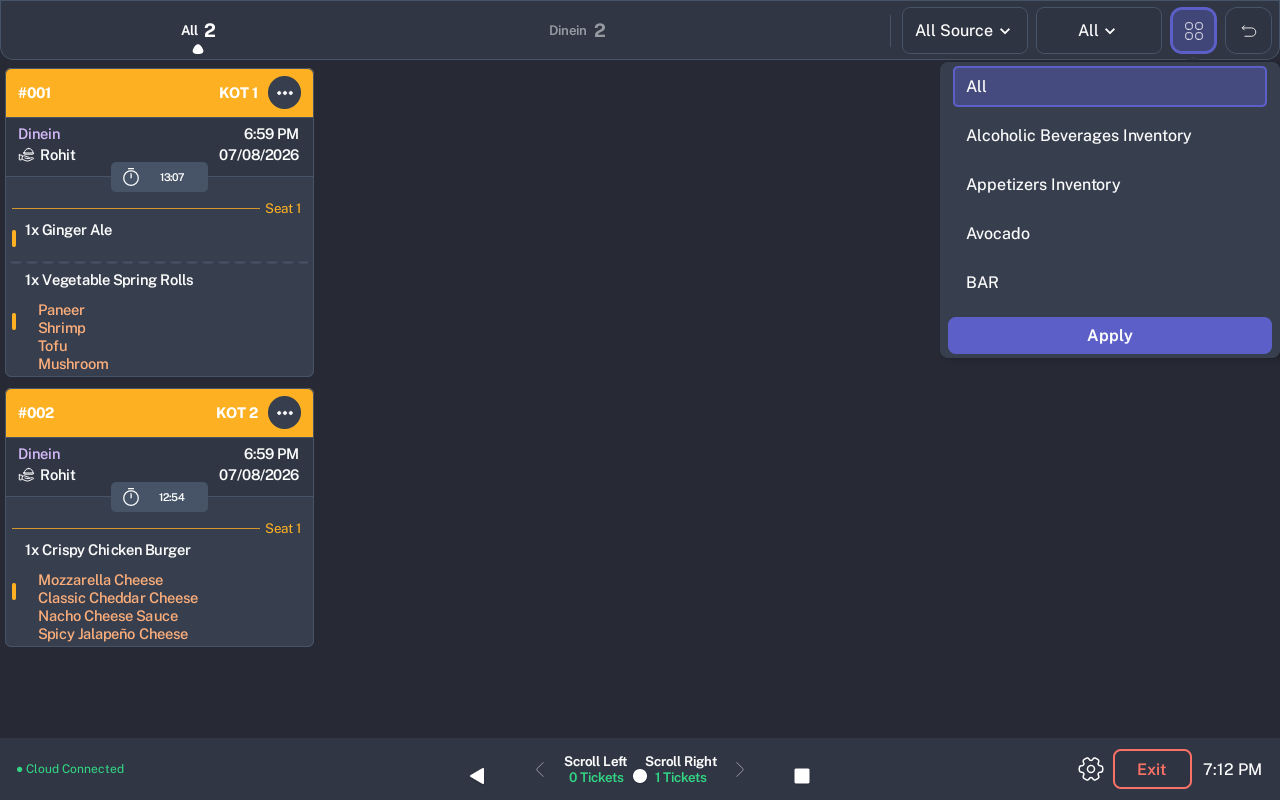
- Tap Apply to refresh the ticket list for the selected labels.
- Select All, then tap Apply, to clear the inventory label filter and show every label again.
Inventory label selections are remembered on the device. The same label filter also affects which bumped tickets appear on the recall screen.
Prepare and Complete Tickets
- When a new ticket appears, the screen plays the KDS sound and shows New Ticket Added with the KOT number.
- Start preparing the items listed on the ticket. Use the seat and modifier details to avoid mixing items between guests.
- Tap an item to move it through the kitchen state used by the restaurant. Items shown as ready are crossed out.
-
Tap the three-dot menu on a ticket. For regular tickets, tap Ready to mark the ticket ready.
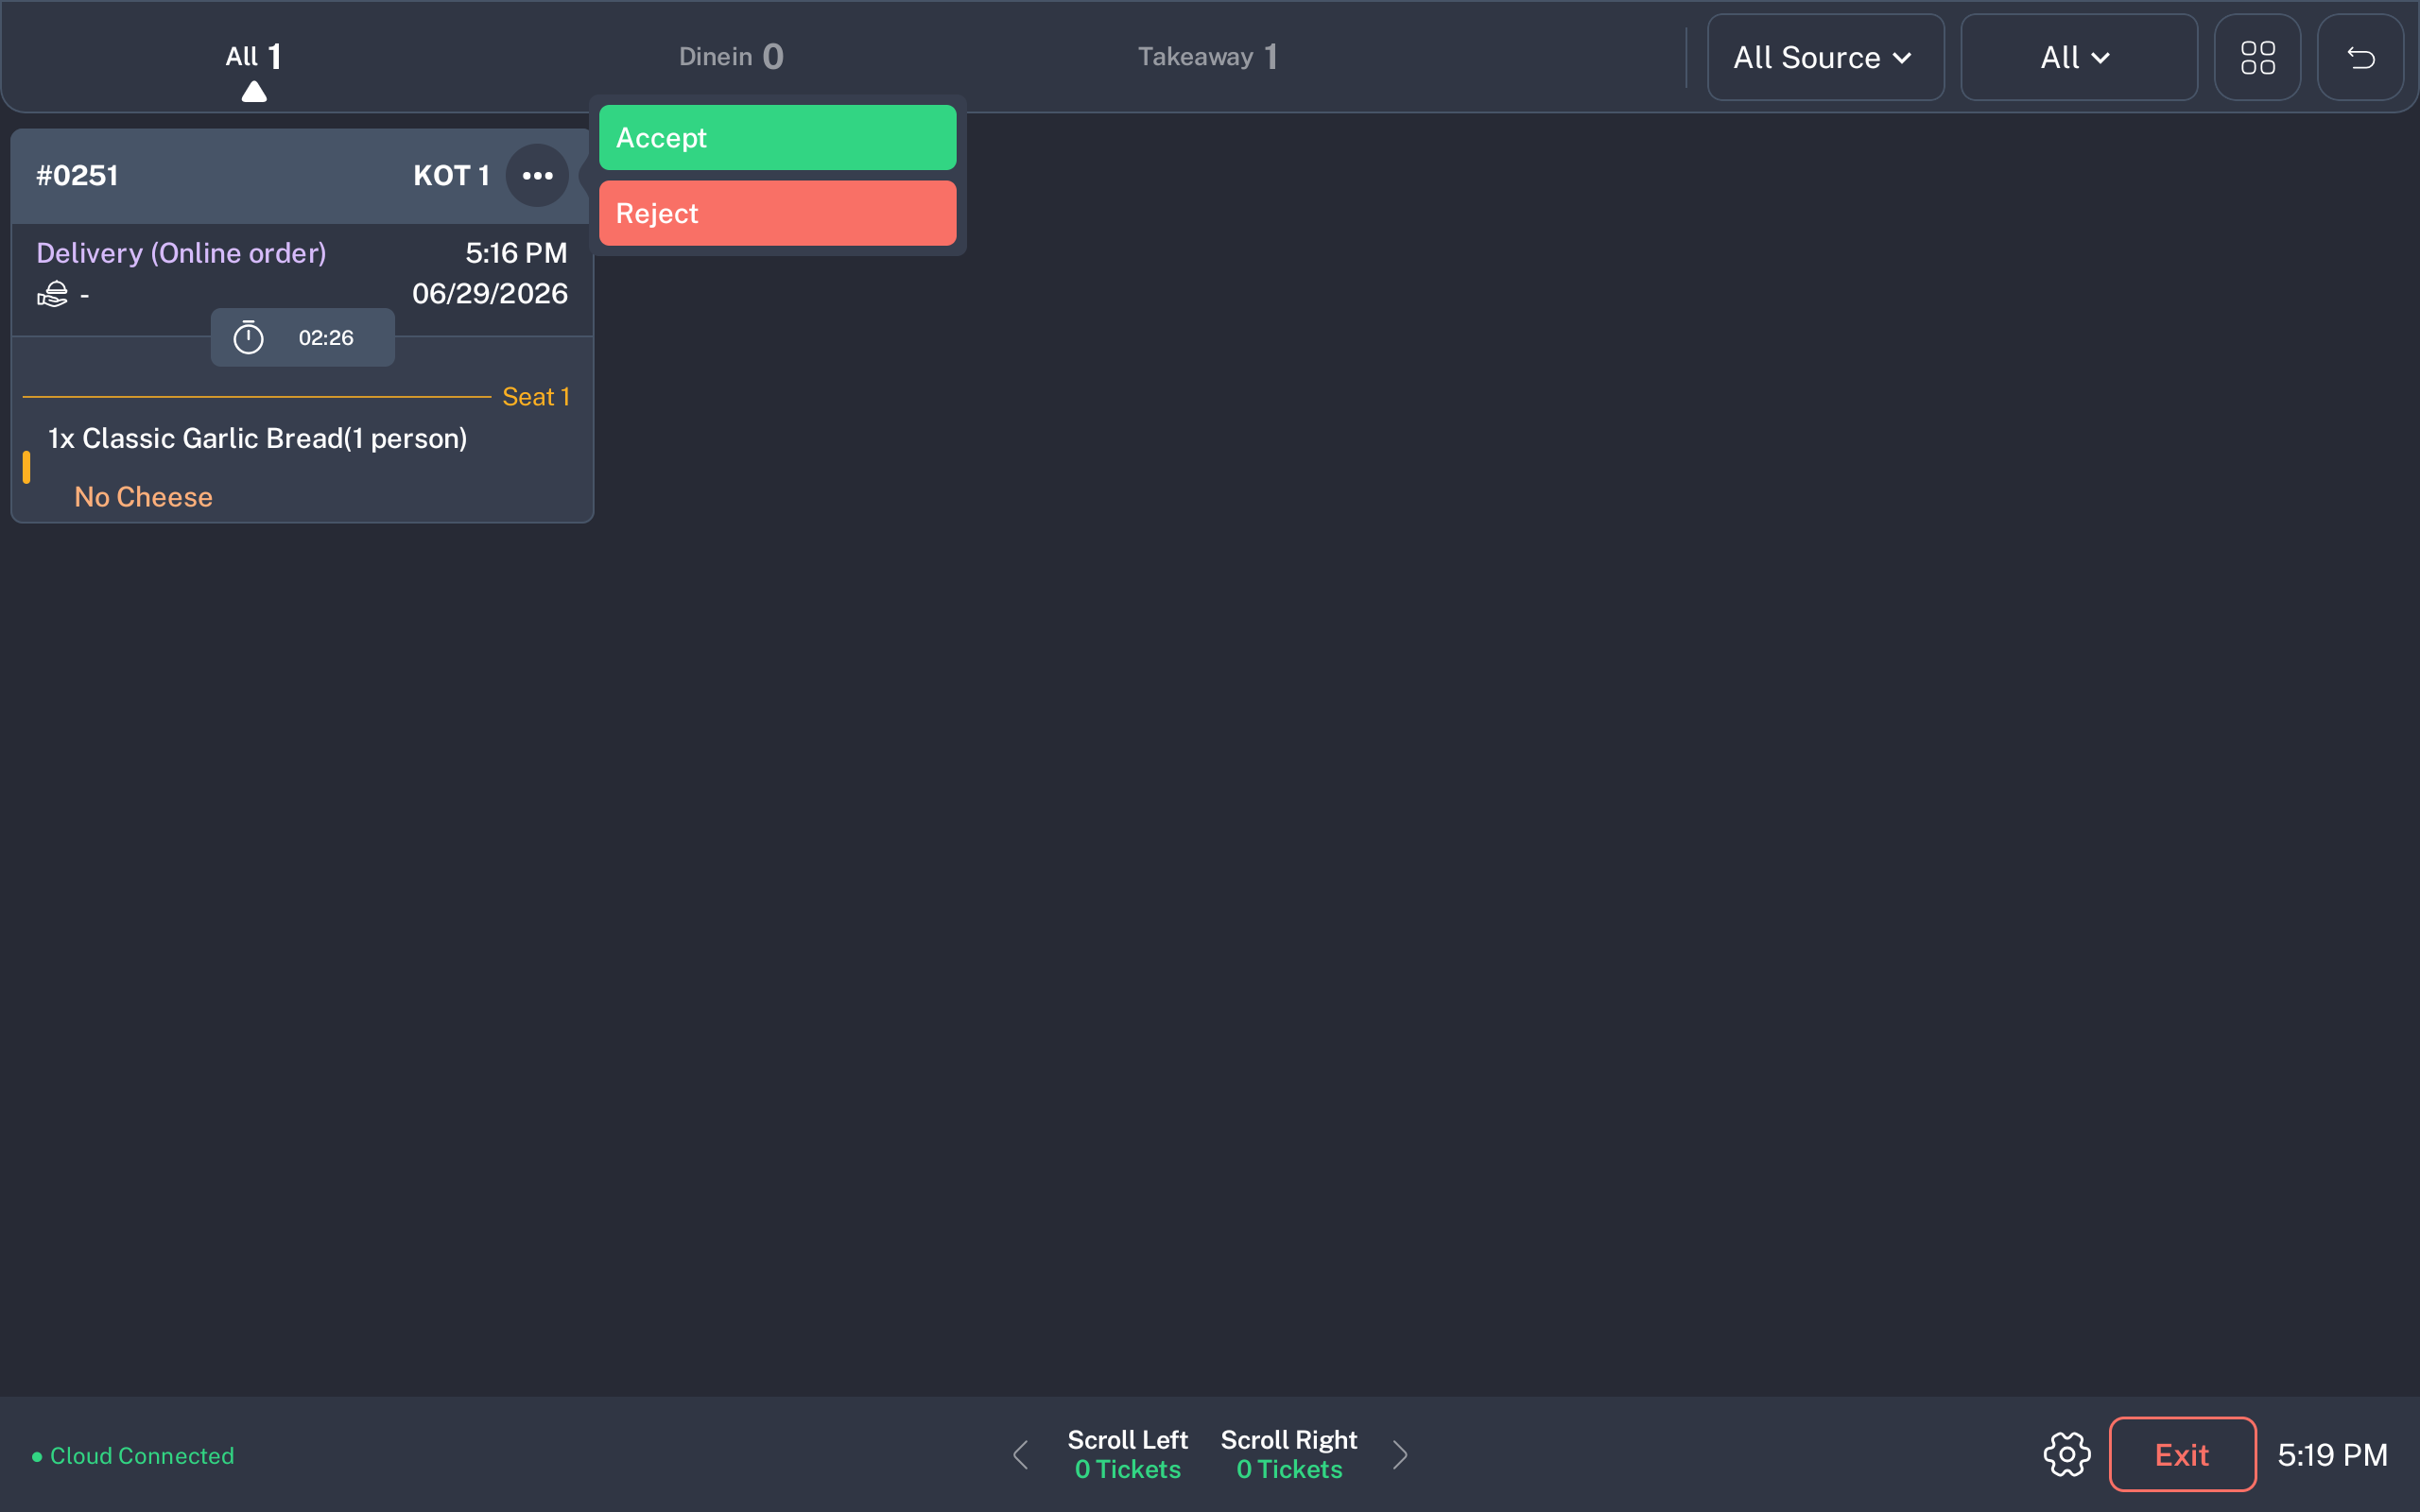
- Use the bottom scroll counts to see whether more tickets are available to the left or right.
For online orders, the same menu can show Accept and Reject before the kitchen starts preparing the order.
Accept or Reject Online Orders
- Find the online ticket. Online tickets can show Delivery (Online order).
- Open the three-dot menu.
- Tap Accept when the kitchen can prepare the order.
-
Tap Reject only when the kitchen cannot prepare it. Enter an optional note, then tap Yes, Reject.
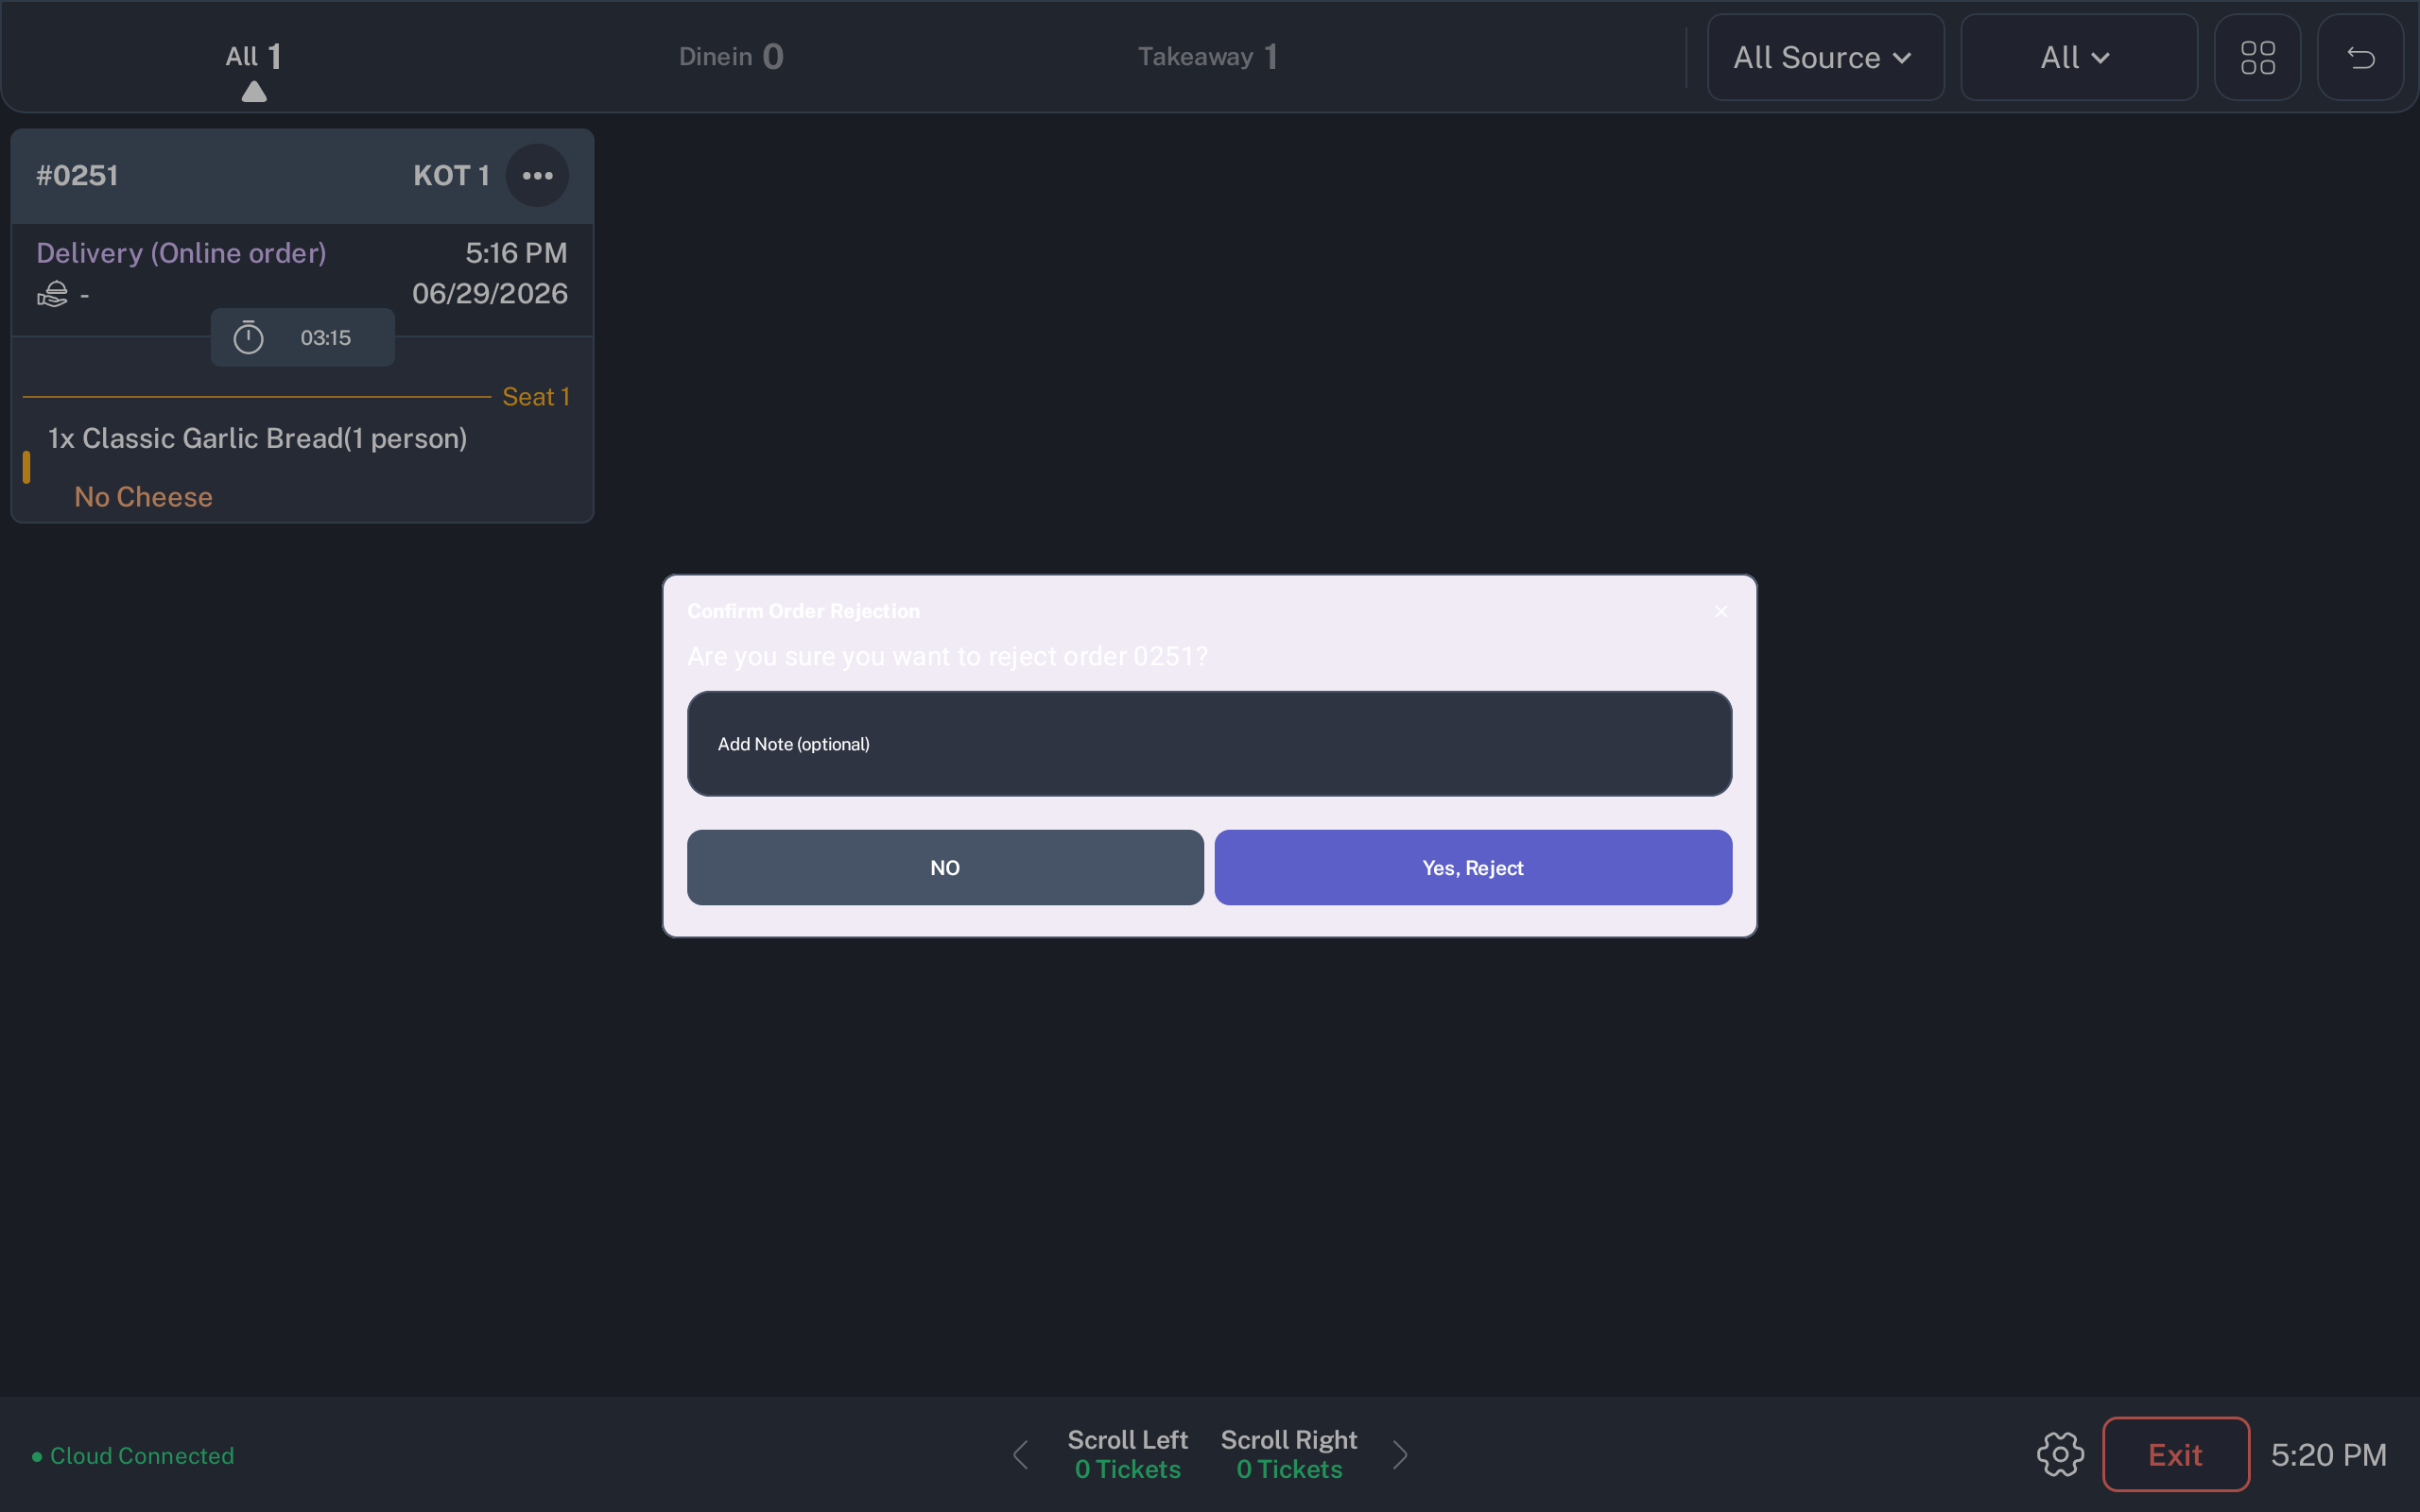
- Tap NO or close the dialog if the order should stay active.
Recall Tickets
-
Tap the recall icon in the top-right header to open Recall Ticket.
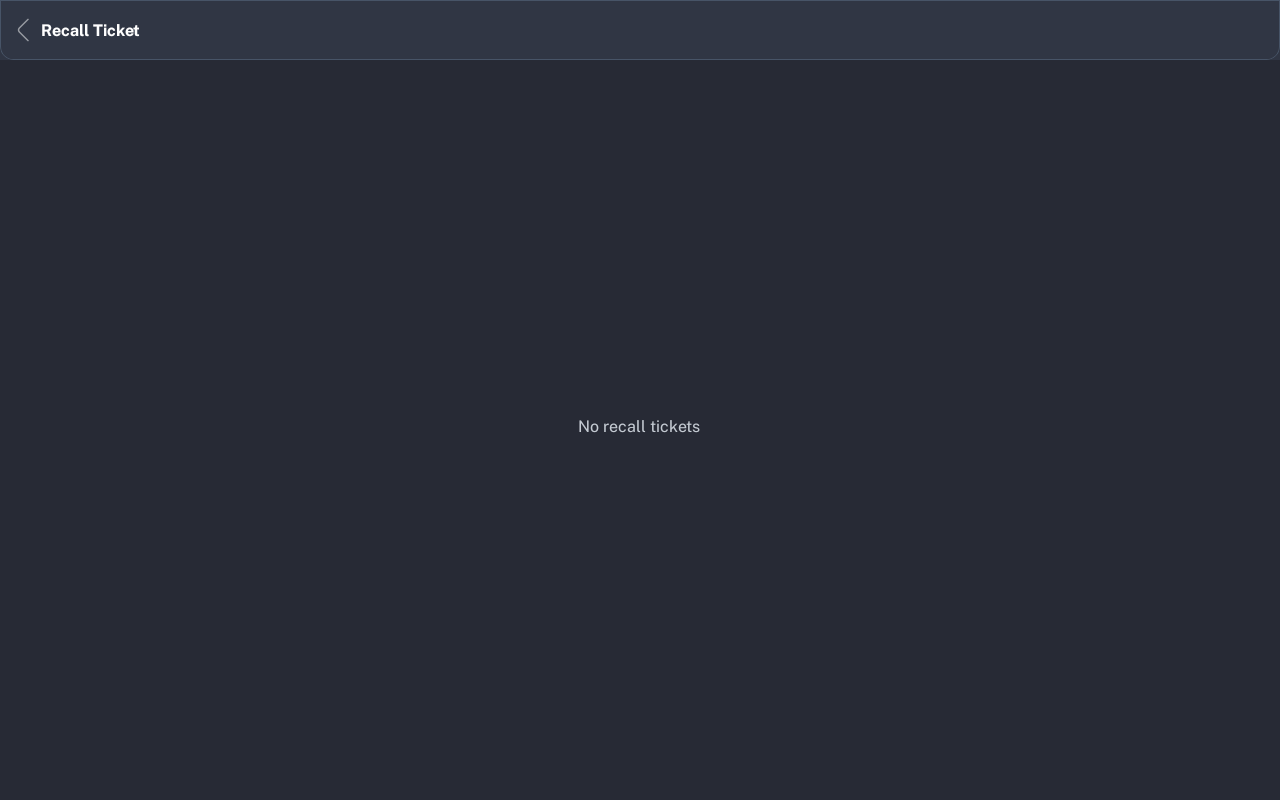
- Review the recalled ticket list. If no ticket can be recalled, the screen shows No recall tickets.
- Find the bumped ticket that needs to return to the active KDS screen. If inventory labels are selected on the main KDS screen, only matching bumped items are shown.
- Tap the ticket header to recall the bumped items. KDS shows a loading spinner while the recall is being saved.
- After recall, return to the main KDS screen and confirm the ticket or items are active again.
- Use Back to return to the main KDS screen.
If all items on a ticket are voided, KDS shows All item is voided, Can’t recall. If recall fails, try again after checking the connection.
Settings and Exit
-
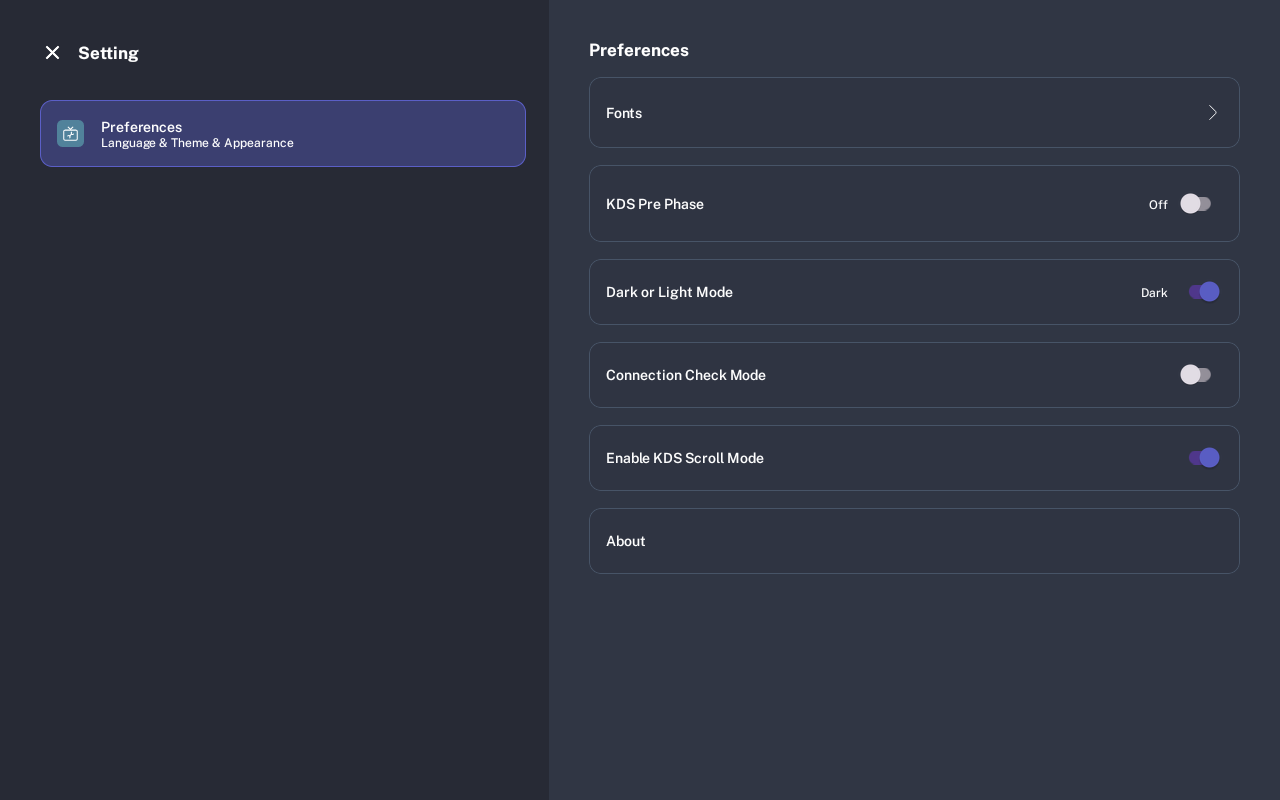
Tap the gear icon to open KDS settings.
-
Open KDS KOT Font Size to adjust ticket text size. Move the five-step font control toward the smaller or larger A, then go back to the KDS screen.
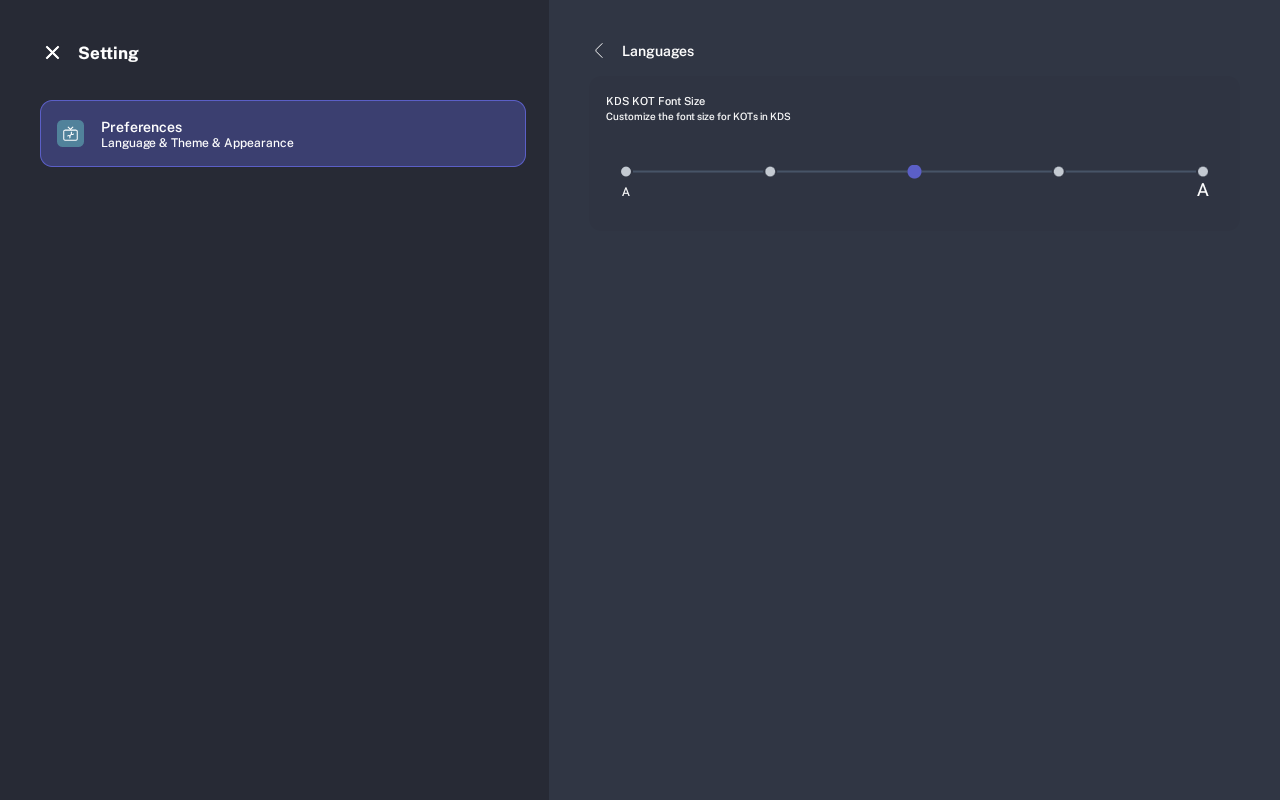
- Use KDS Pre Phase when the restaurant wants new KOTs to stay in their first kitchen phase until staff starts them.
- Use Enable KDS Scroll Mode when the restaurant wants KDS to use the scroll-style ticket display.
- Return to the KDS screen and confirm ticket size, visibility, and workflow behavior look correct.
- Tap Exit when the kitchen display should be closed on that device.
Expected Result
Kitchen staff can see active tickets, filter the queue, prepare items, mark tickets ready, accept or reject online orders, and recall completed tickets when needed.
Common Questions
- What does Time Out mean? The ticket has passed the configured preparation time and needs attention.
- What does Priority mean? The order item was marked as priority and should be handled according to restaurant rules.
- Why do I see Accept and Reject instead of Ready? The ticket is a pending online order. Accept or reject it before using the normal ready workflow.
- Do filters change the ticket counts? Yes. Counts update based on the selected order type, source, status, and inventory labels.
- Can I change the text size? Yes. Open settings from the gear icon and adjust the KDS KOT font size if your role allows it.
Notes
Screenshots were reused from existing KDS documentation assets. Device-specific entry into the KDS screen can vary by restaurant setup, so a manager or QA user should verify the launch path before publishing this guide to staff.