How to Itemize an Order
Purpose
Use this tutorial when a cashier or server needs to split one ordered line with a quantity of 2 or more into separate single-quantity items. Itemizing is useful when guests want to split payment by item, move individual items, or handle each quantity separately.
Before You Start
- The order must already have an item in the cart with quantity 2 or more.
- The item must still be in progress.
- The item must be fully added to the cart.
- The item cannot be a voided item, wastage item, offer item, or gift card item.
- If a combo offer is waiting for staff action, apply or skip the combo offer before editing cart items.
Steps From the Menu Screen
-
Open the active order on the Menu screen.
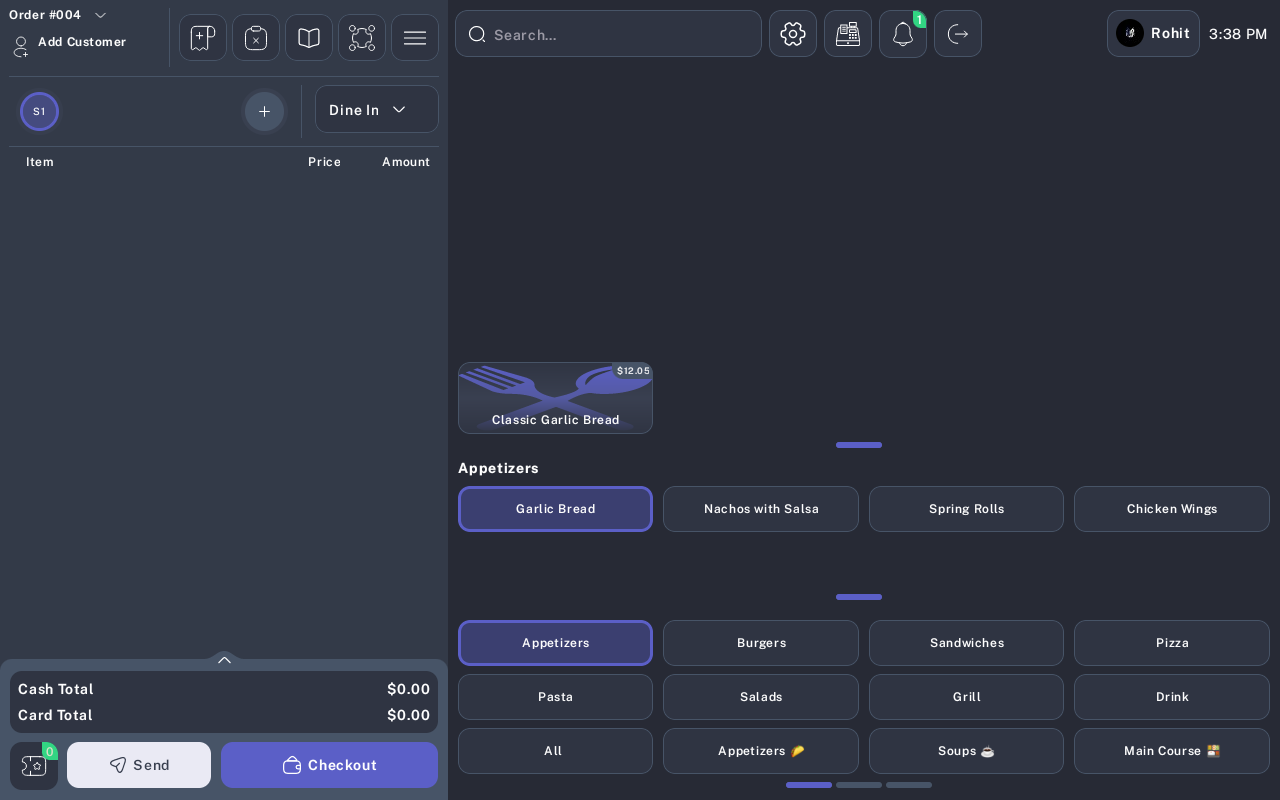
- Find the item in the order cart that needs to be itemized.
- Confirm the item quantity is 2 or more.
-
Swipe the item row to reveal the edit action.
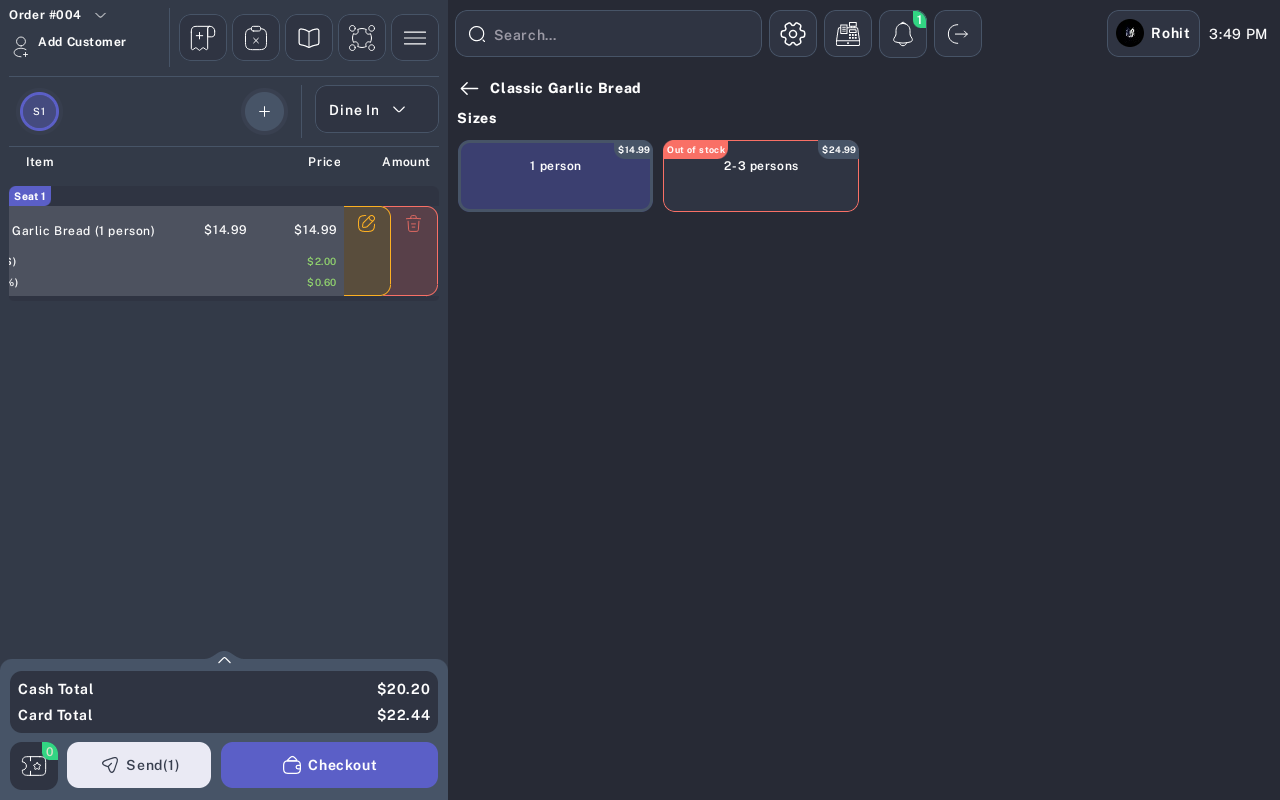
- Tap the edit icon.
-
In the item edit panel, tap Itemize order.
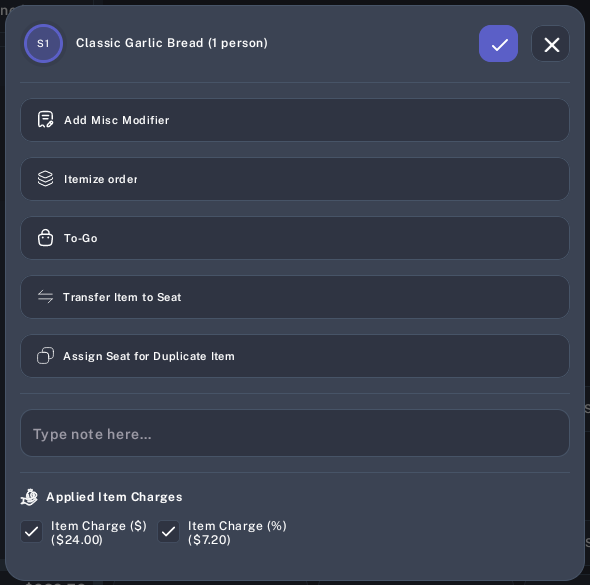
- Wait for the edit panel to close and the cart to refresh.
-
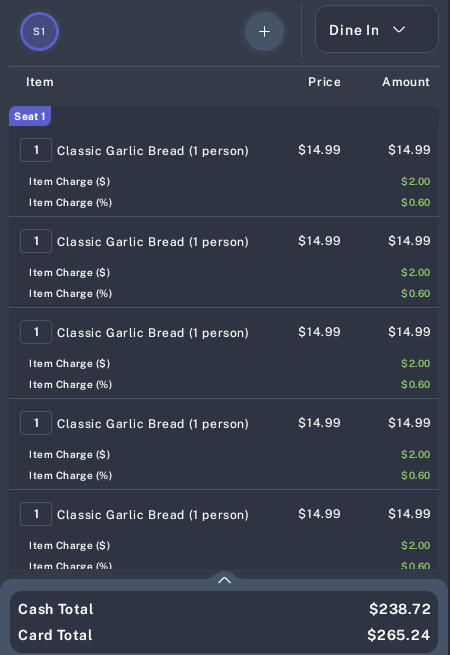
Review the cart and confirm the original multi-quantity line is now shown as separate quantity-1 lines.
Steps From Split by Items Payment
-
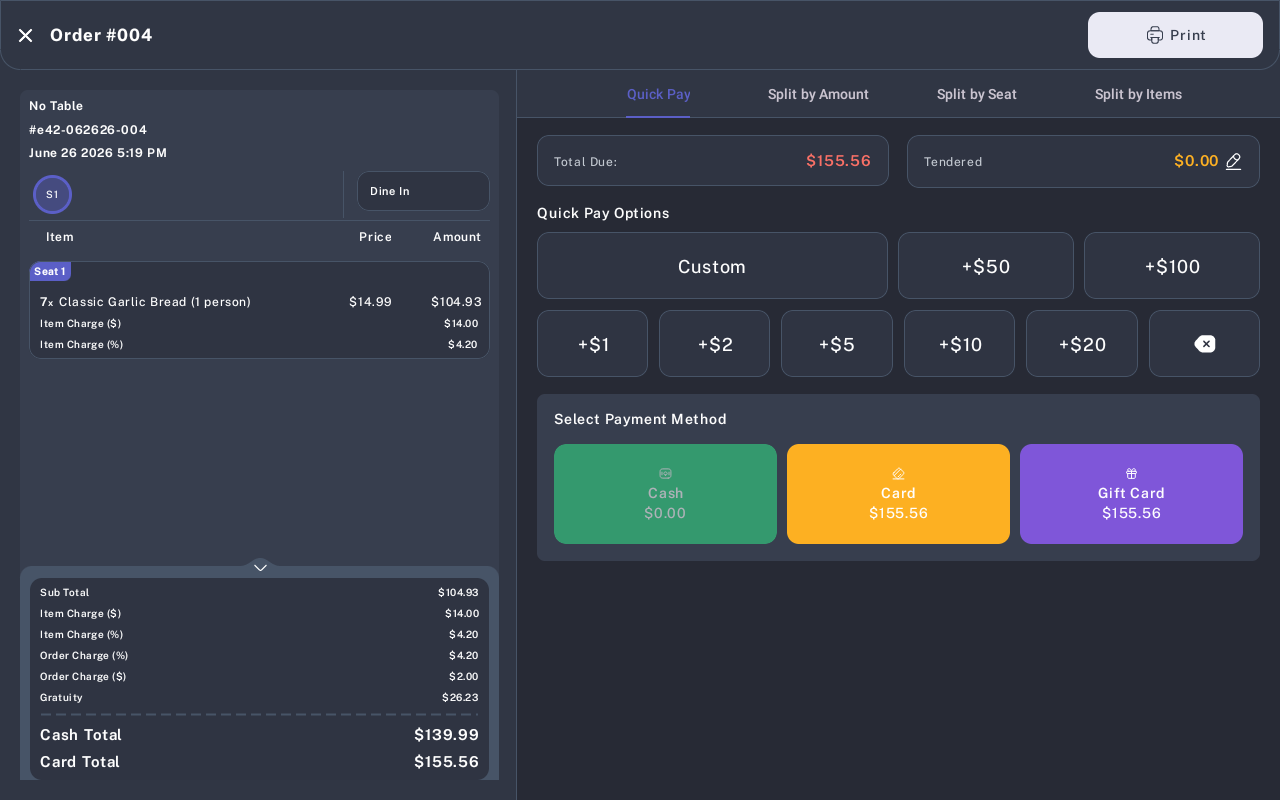
Open the order payment screen.
-
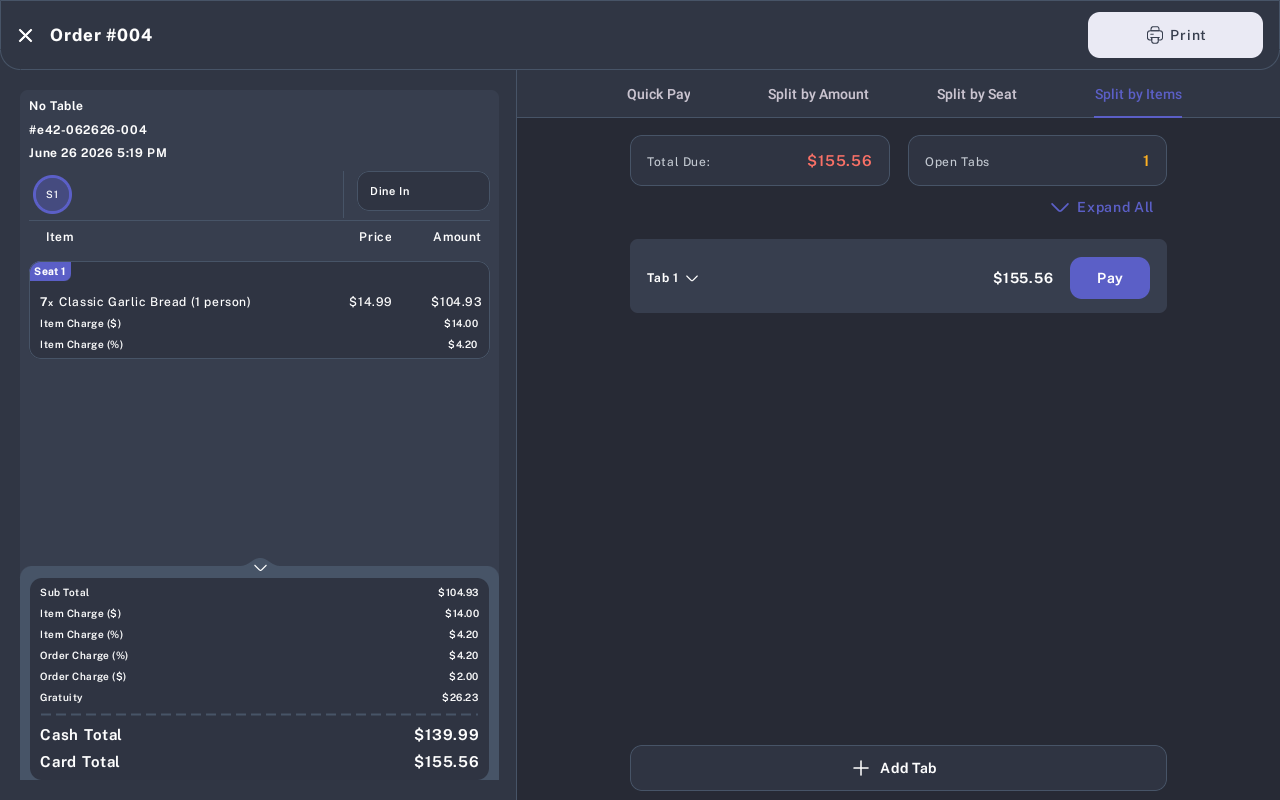
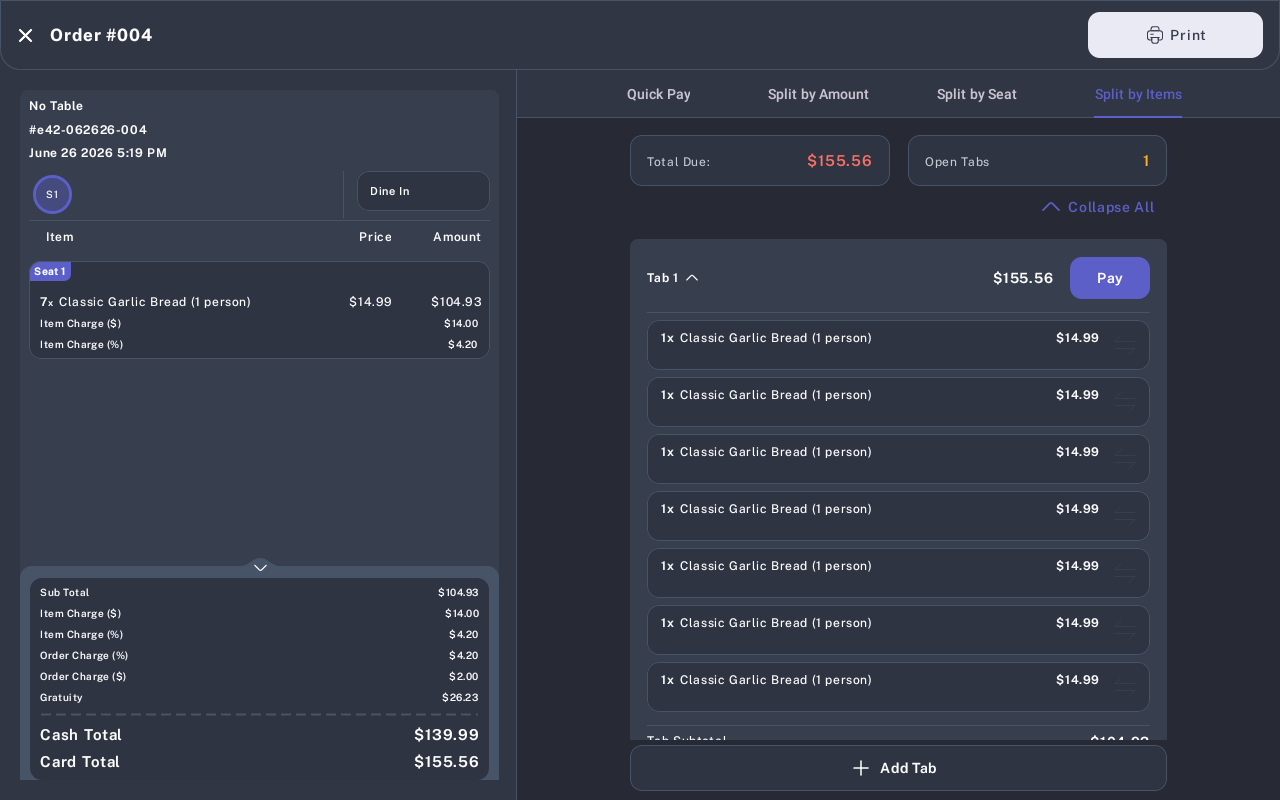
Select Split by Items.
-
Expand the tab if needed, then find an item with quantity 2 or more.
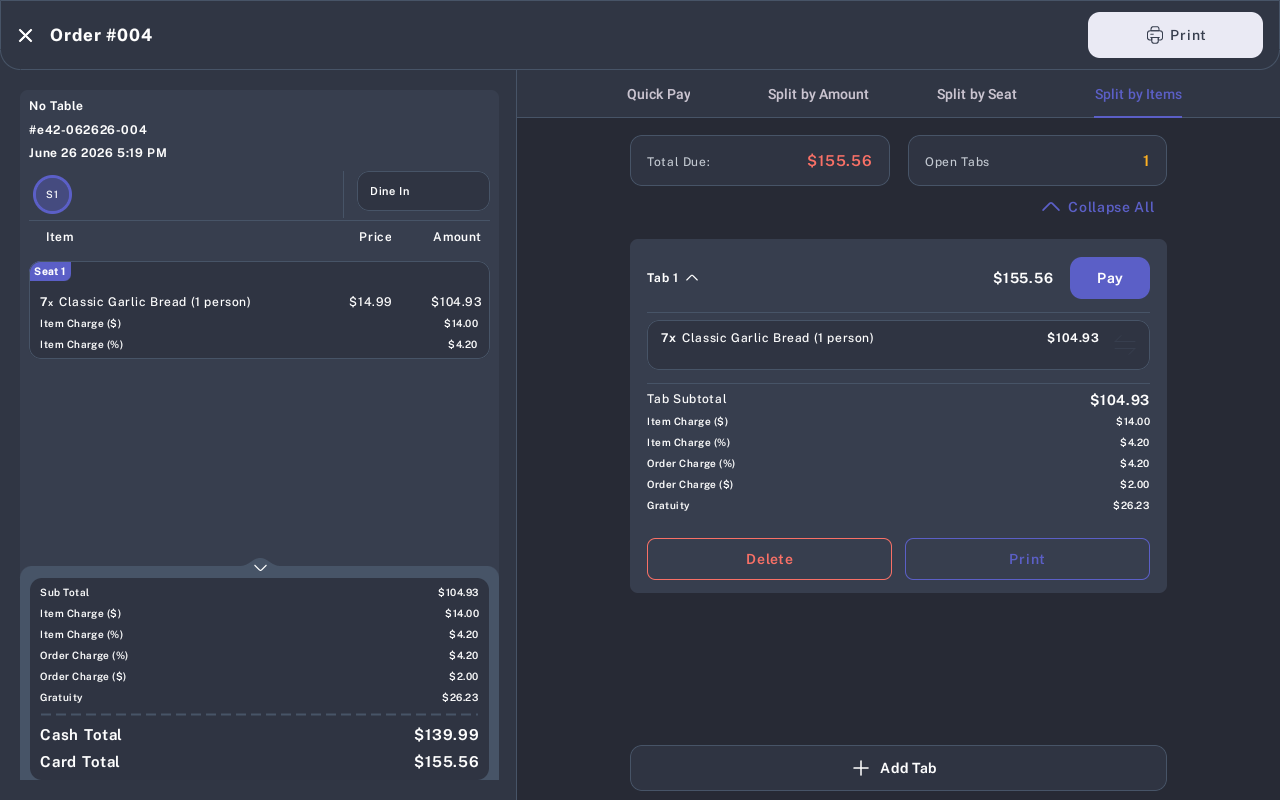
- Long-press the item.
-
When the POS asks, Are you sure you want to itemize this order?, tap Yes.
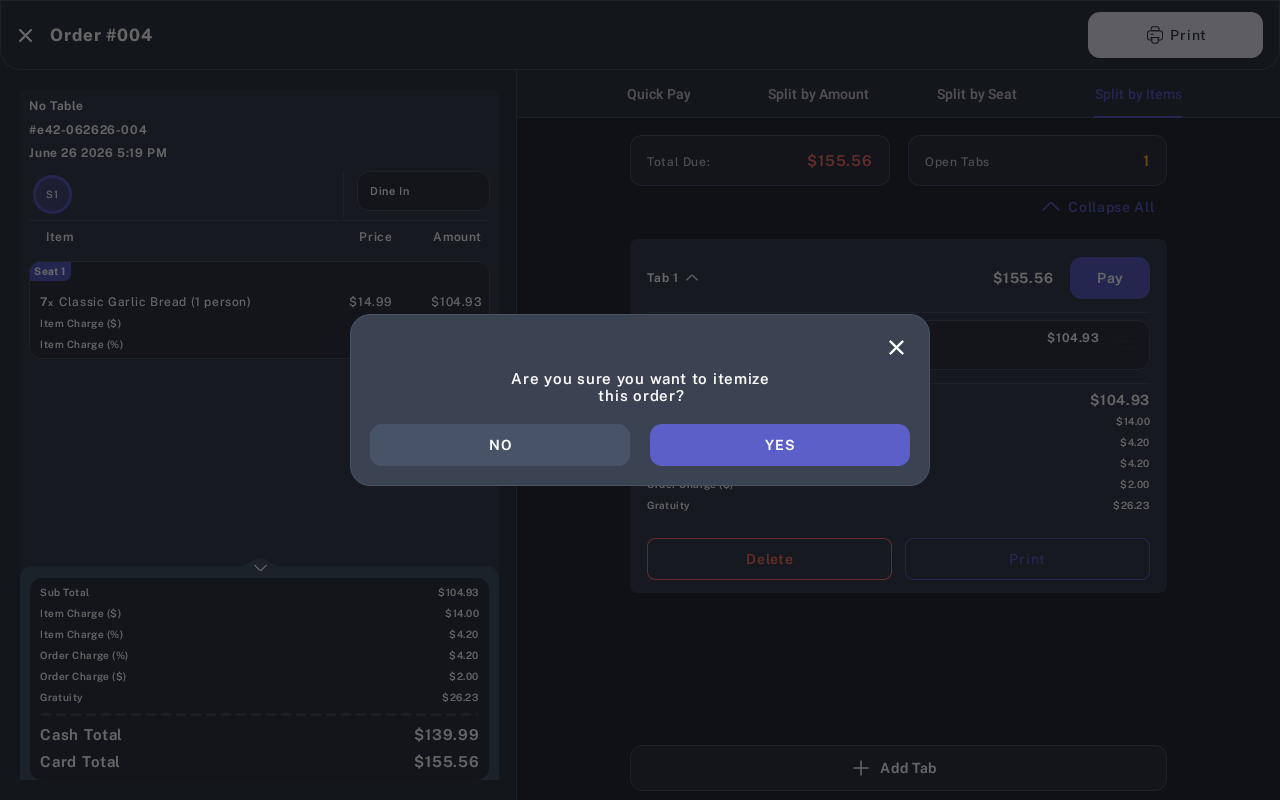
- Wait for the Split by Items list to refresh.
-
Select or transfer the newly separated items as needed for payment.
Expected Result
The POS replaces the original item line with separate item lines, each with quantity 1. The total order amount should stay the same after itemizing. Modifiers, allergies, size, charges, taxes, and to-go status should remain with the itemized lines.
Common Questions
- Does itemizing change the order total? No. The item quantity is split into separate quantity-1 lines, but the order subtotal and total should remain the same.
- Can I itemize a quantity of 1? No. Itemizing is only available when the item quantity is 2 or more.
- Can I itemize after payment has started? Only eligible in-progress items can be itemized. If a payment or partial payment already exists, follow the restaurant's manager procedure before changing the order.
- Can I use itemizing for split checks? Yes. Itemizing helps separate multiple quantities so individual items can be selected, transferred, or paid separately in Split by Items.
Notes
- Assumption: staff access the item edit action by swiping the item row in the cart and tapping the edit icon. Verify this gesture on the target device type during QA.
- Assumption: the visible payment tab label is Split by Items.